How to draw overlapping objects: decide which edge disappears
Keep the front contour and stop the hidden rear contour. A circle and rectangle show the change; a triangle gives you a fresh problem to solve.
Keep the front edge; stop the hidden edge
Two outlines cross, and your drawing looks like wire shapes. To suggest two separate opaque objects, decide which one is in front. Keep its visible outline continuous through the overlap; omit the part of the rear outline that it covers.
Try this with a pencil, eraser and paper. The example uses flat cards: a round card A and a rectangular card B. Their sizes and positions stay fixed. Only the visible lines change.
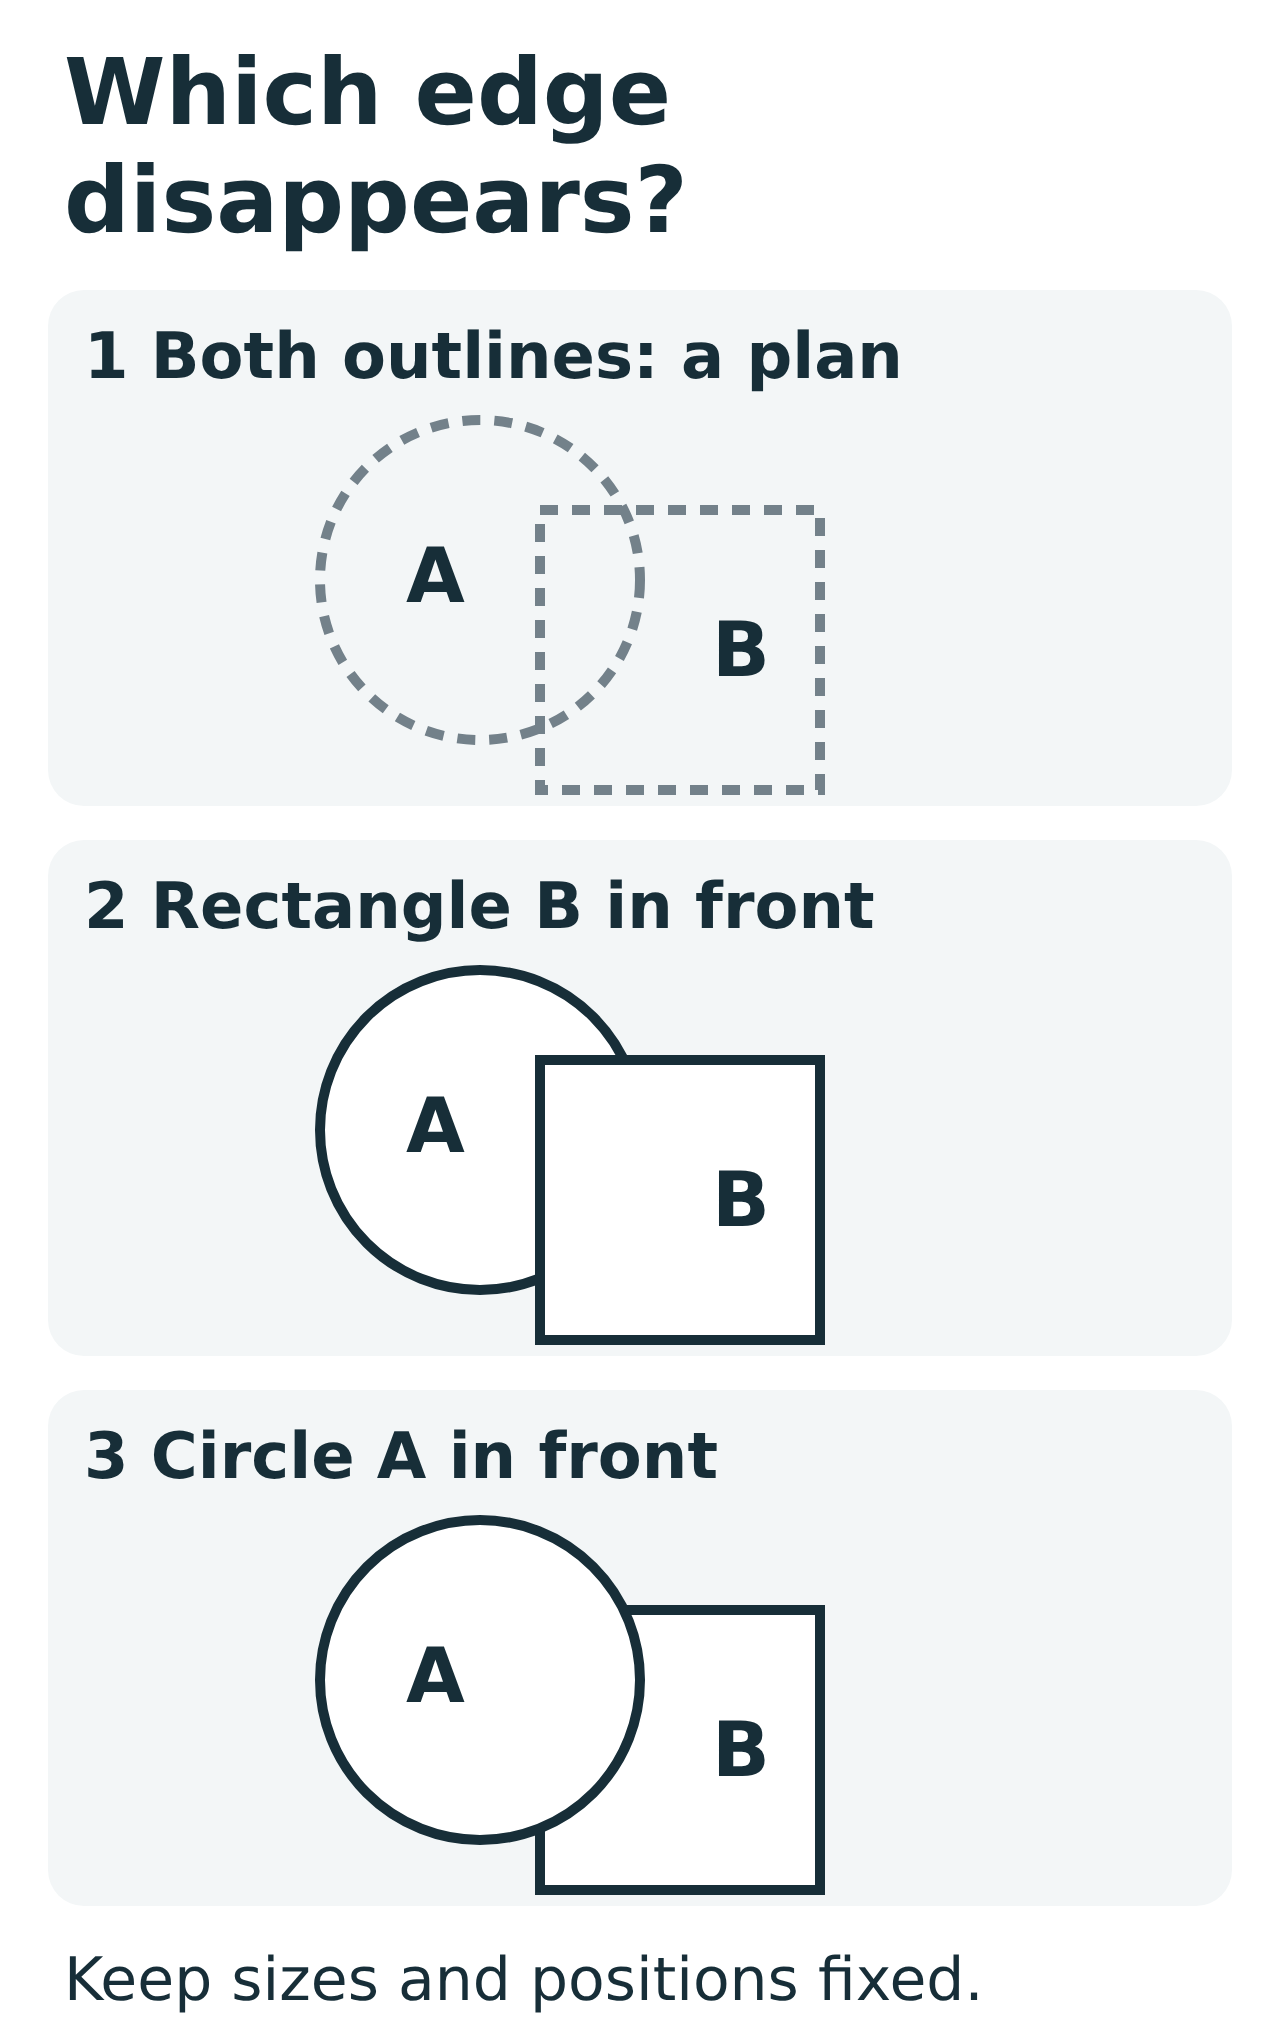
Worked example: put rectangle B in front
Copy the first pair lightly. At each of the two places where the outlines cross, mark a small dot. Trace B’s complete outline with a firmer line. Now follow A’s circle: the right-hand arc between the dots lies inside B. Leave that arc out of the finished drawing. Keep the rest of the circle.
Do not close A’s remaining arc with a straight line. That would give the rear card a new flat edge. Its visible contour should end at B and resume beyond it. If you used full construction lines, erase those inside B after the final contour is clear.
Reverse the order without changing the layout
Make another light copy of the same pair. This time keep all of circle A. Omit the parts of B’s top edge and left edge inside A, including their shared corner. Keep B’s right and bottom edges and the remaining top and left segments. Compare this with the third drawing.
Check the two meetings separately: the same card must be in front at both. Shading cannot repair a line that accidentally runs through an opaque foreground card. Construction lines may stay light while you work; they need not become finished visible edges.
Read the meeting, not just the whole object
A rear contour often ends against a continuing front contour, making a T-like junction. The continuing line suggests the nearer edge; the line that stops suggests an edge hidden behind it. The T may be tilted or curved. It is a pictorial cue, not proof of a particular distance or a guarantee that every drawing will read clearly.
If two outlines only touch at one point, the overlap may be unclear. For this exercise, move a card enough to produce a clear overlap or a visible gap. When drawing a real arrangement, keep your viewpoint steady and check what is actually visible before adjusting the drawing.
Your turn: change the shapes
Copy the triangle T and rectangle R below. Show R in front without changing either shape’s size or position. First mark where their outlines cross; then draw only the visible contours on a clean copy. Do not look at the answer until you have chosen the hidden lines.
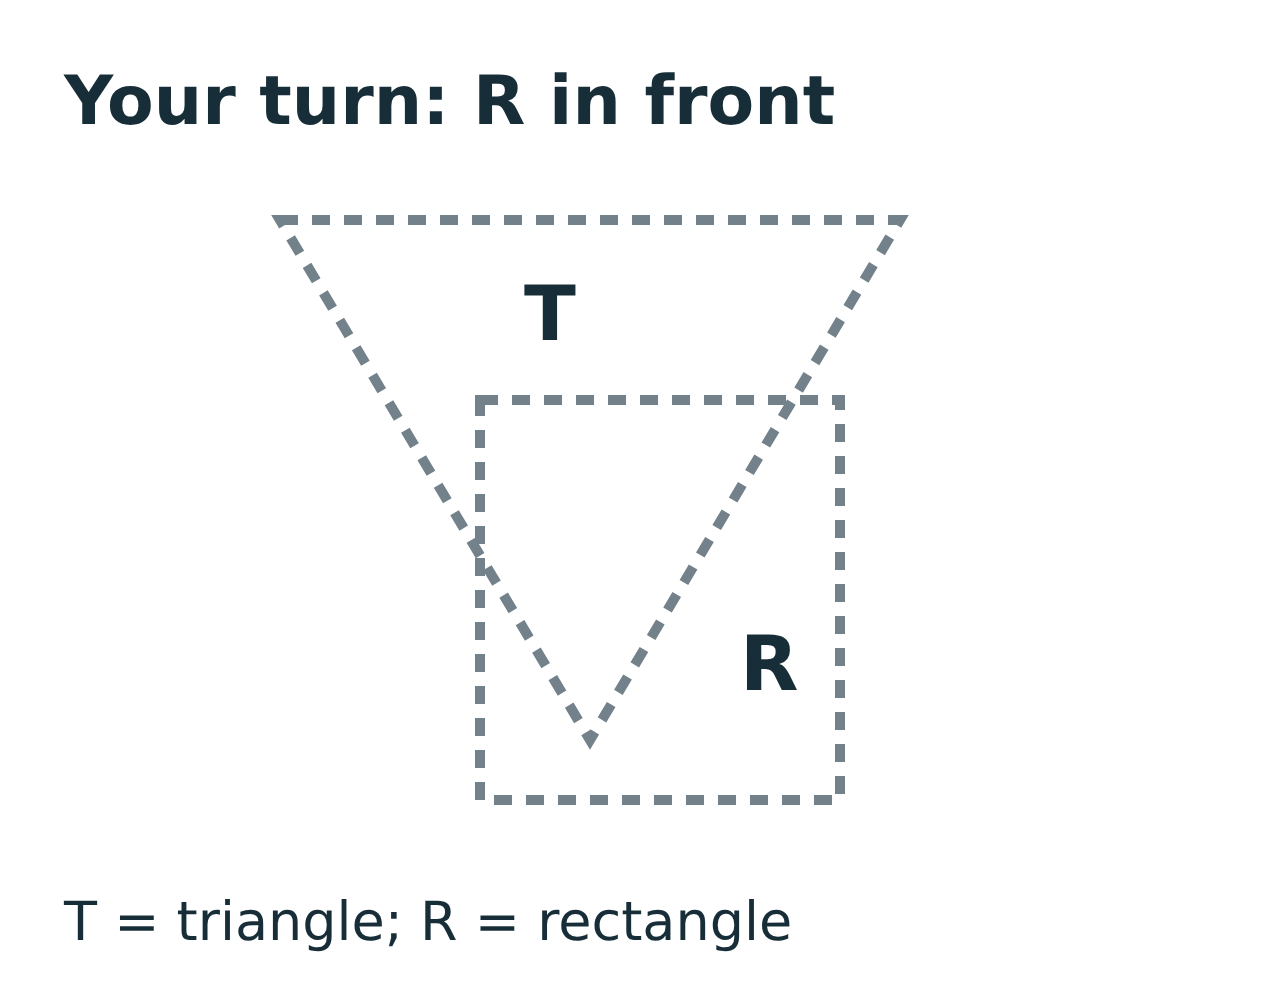
Check your transfer answer
Choose which lines to keep before checking the answer. If the buttons are unavailable, open the answer explanations below.
Answers and explanations
- The two lower triangle-side segments inside R.: Yes. Those segments and the tip lie behind R. Keep the rectangle’s entire outline.
- The rectangle’s top-left corner.: That would put the triangle in front at this overlap. The stated task puts R in front.
- The triangle’s whole outline.: Only the covered part disappears. The triangle’s top and upper side segments remain visible.
Print the two-page practice sheet
Three drawing spaces on page 1; worked answers and a reverse-order challenge on page 2. A4 PDF; no exact print scale is needed.
Use the same check on an ordinary object
Put a closed book partly behind a plain opaque cup. From one steady viewpoint, find a book edge that disappears behind the cup. Draw just that meeting first, then add the rest. Avoid starting with transparent glass or an open wire object: their visible lines need a different treatment.
This exercise isolates overlap. It does not teach the whole shape, perspective or lighting of a cup. Use it when you need to decide which visible contour continues and which one stops.