Cut a doorway in a postcard
One card. No tape. Make an opening for a person.
Give someone the challenge first
Put a postcard-sized rectangle of paper on the table: 10 × 15 cm. Add scissors. The challenge is to make a hole a person can step through. No joining the ends, tearing pieces off, or swapping the sheet.
A circle in the middle? Too small. A spiral? That makes a long strip, but leaves the loop open. You need a third move: a long route through the paper that still comes back to its starting point.
Try to find it before reading on. Or go straight to the measured cutting plan below.
Download the 150 × 100 mm PDF template
One A4 page. Print at 100% / Actual size; the calibration line must measure exactly 100 mm. Cut out the outer rectangle, then fold with the pattern outside.
1. Fold it — and identify the two edges
Start with ordinary paper rather than a thick greeting card. You need a 150 × 100 mm rectangle, a ruler, a pencil, and scissors. Help children who find it difficult to stop the scissors precisely.
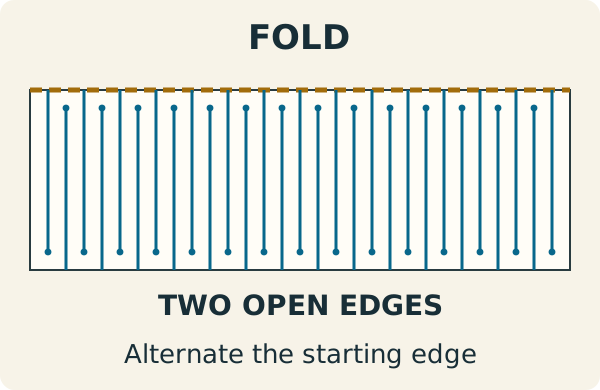
Fold the rectangle in half lengthwise to make a 150 × 50 mm strip. Turn it so the fold is at the top. The two open edges lie together at the bottom.
The PDF has its cutting pattern on one half: keep that pattern outside when you fold. Print at 100% / Actual size, without Fit to page. Check the 100 mm calibration line with a ruler. The diagrams on this page show the sequence, not physical scale.
2. Make 29 cuts, alternating edges
Mark the long side every 5 mm: at 5, 10, 15, and so on up to 145 mm from the left edge. That gives you 29 crosswise cutting lines. Cut through both layers together.
Start the first cut at the fold and stop 5 mm short of the open edges. Start the second at the open edges and stop 5 mm short of the fold. Then start at the top again, then the bottom, all the way across.
Each cut is 45 mm long. The first and last cuts start at the fold. None goes all the way through the strip: a small uncut connection at the opposite edge holds the paper together.
3. The last cut: leave both ends alone
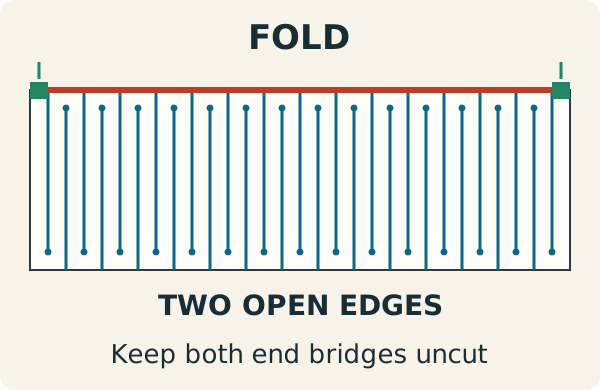
Now cut along the fold itself, between the first and last crosswise cuts: from the 5 mm mark to the 145 mm mark. It helps to open the paper a little and slip the scissor tip into the existing slits. You do not need to remove a strip of paper.
Leave the outermost 5 mm of the fold intact at each end. These are green in the diagram. They are the two bridges that join the halves of your future loop. Cut both and you get two separate strips instead of a loop.
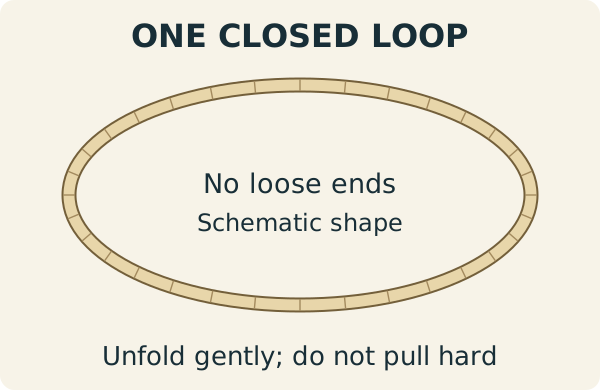
Gently ease the folds apart over the table. First check that you have one closed loop. Do not pull hard on the thin strips: if a fold is still joined, find it instead of forcing it open.
The doorway opens
Try the loop around a chair back or another object much wider than the original card. If it opens freely, try stepping through it yourself. Too tight? Start with a larger sheet and scale every measurement up together, including the cut spacing and the bridges.
The paper has not gained any area. You have rearranged it into one long, winding band that closes into a loop. In the ideal flat geometry of this template, the route along the middle of that band is 3 metres long. That is a path length, not a promised hole diameter: opening the loop depends on the folds, the cuts, and the paper.
This is a classic paper puzzle, with versions from Science World, Ohio State University, and NRICH. The measured plan here is Coru’s version for a 150 × 100 mm card.
Put an uncut card beside it. Now the hardest part of the trick is keeping the answer to yourself long enough.